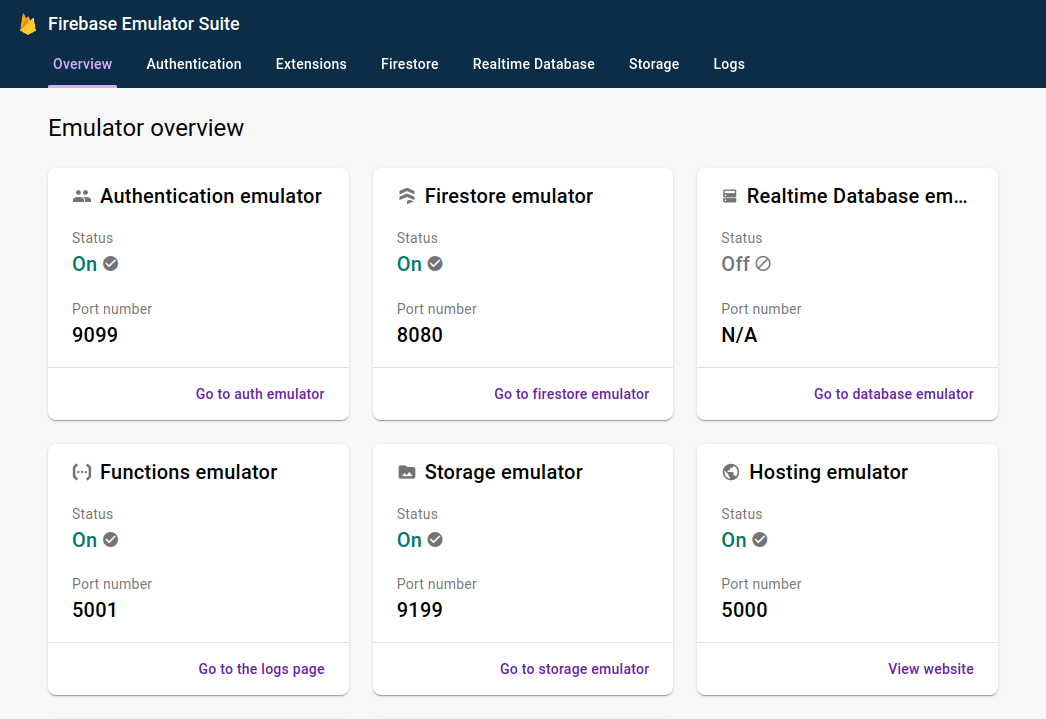
The Firebase Emulator Suite provides local emulation for Authentication, Realtime Database (RTDB), Firestore, Storage, Cloud Functions, and Hosting services. It comes complete with a dashboard and API for management of the emulated infrastructure. Overall the documentation is excellent, but it can take quite a lot of time and practice to maximize the benefits of using the emulator for local development. My goal with this short article is to help you shortcut some of the learning curves and corner cases to jump straight in to productive development.
Getting Started
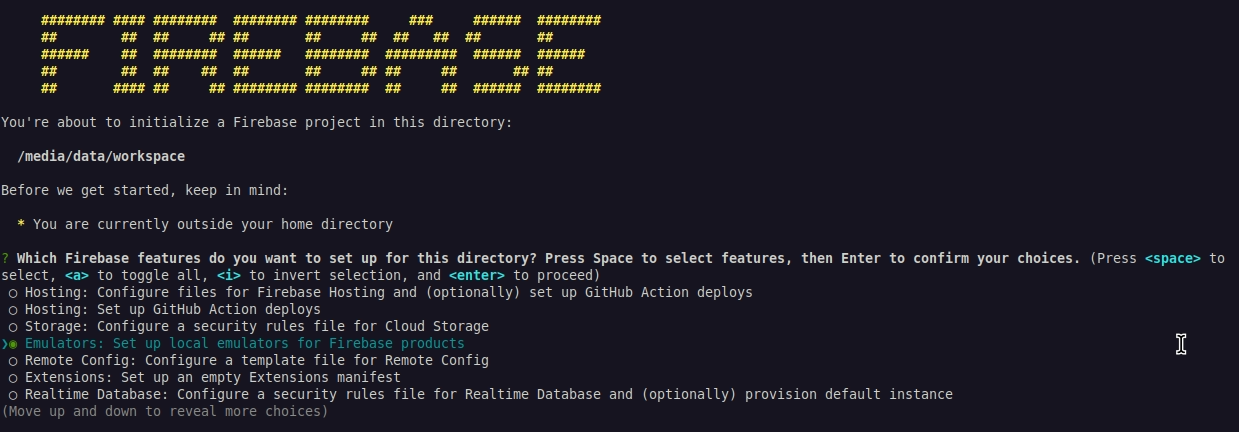
When creating a new Firebase project using firebase init you can select the "Emulators" option to get started.

If you have an existing project you can add emulator support or reconfigure your emulators using firebase init emulators. This allows you to select (and install) the emulators you care about. Once emulator support has been added to a project you should find an emulators section within the firebase.json file looking something like this:
  "emulators": {
    "firestore": {
      "port": "8080"
    },
    "ui": {
      "enabled": true,
      "port": 4000
    },
    "auth": {
      "port": "9099"
    }
  }
Strictly speaking most of these options are optional as each emulator service has its own default ports, but the init script adds the values here and it's often convenient to leave them explicitly configured within your project. By keeping the ports here all future users of the emulator will quickly know what ports to connect to (without looking up the Firebase documentation for the default values), and can quickly adjust port numbers as necessary to something that doesn't conflict on their system.
With the configuration complete, running firebase emulators:start will launch all of the configured emulators at once, along with the UI console.

Connect Your App
With the Emulators running, now you need to connect your application to point to the emulators instead of the live Firebase project in the cloud. If you're using a standard web front-end in JavaScript or TypeScript you can use the modular API to connect to the emulator. The following code shows how to do this for each service.
import { getApp } from 'firebase/app'
import { getAuth, connectAuthEmulator } from 'firebase/auth'
import { getDatabase, connectDatabaseEmulator } from 'firebase/database'
import { getFirestore, connectFirestoreEmulator } from 'firebase/firestore'
import { getFunctions, connectFunctionsEmulator } from 'firebase/functions'
import { getStorage, connectStorageEmulator } from 'firebase/storage'

let functionHost = `https://${region}-${project}.cloudfunctions.net`

if (location.hostname === 'localhost') { // However you want to detect local development
  connectAuthEmulator(getAuth(), 'http://localhost:9099') // Note the different syntax here
  connectDatabaseEmulator(getDatabase(), 'localhost', 9000)
  connectFirestoreEmulator(getFirestore(), 'localhost', 8080)
  connectFunctionsEmulator(getFunctions(getApp()), 'localhost', 5001)
  connectStorageEmulator(getStorage(), 'localhost', 9199)

  functionHost = `http://localhost:5001/${project}/${region}`
}

const functionUrl = `${functionHost}/myFunctionName`
Callable functions use the connectFunctionsEmulator() method for configuration while HTTPS functions must be more manually configured using the URL pattern as shown above.
Trigger-based functions will be deployed to the emulator automatically and need to special configuration in your apps.
If you use Angular through the AngularFire SDK you'll use a similar approach to the above example, but the imports will come from @angular/fire, the configuration will be performed in the app.module.ts file, and you'll be able to use the Angular environment configuration to determine when to select for local development. The AngularFire modular sample app provides an excellent overview.
Data Setup
One of the major barriers to working on an emulated cloud native environment is the lack of data. When testing in a live environment, your accounts and data already exists and remain in place from test to test. When running in a local emulated environment, you may find that you'll need to create new accounts and set up new data every time you want to run your app, which is clearly not a good use of time.
Fortunately, Firebase has you covered on this. The easiest way to get started with a full data configuration is to use firebase emulators:start --export-on-exit. This will spin up your emulators as normal, but when you shut them down all of the data generated during your session will get saved to a local folder. This is a great opportunity to setup test accounts and test data and then exit, saving this information for later.
If you've already started your emulators but forgot the --export-on-exit, or if you want to specify the export directory, you can use firebase emulators:export ./dir while the emulators are running to save the current emulator data in the specified directory.
Once you have emulator data saved to a directory, you'll want to be able to launch the emulator with this data as the starting point. To do this run firebase emulators:start --import=./dir where ./dir is the directory containing the saved data.
Note that it's possible to have multiple data profiles saved for situations that you may need multiple different sets of test data. You can share this data with your team as well, either through a shared folder or by committing to source control.
To make it easier to remember to run the import you can setup a new npm script in package.json:
"scripts": {
  "emulators:save": "firebase emulators:export ./dir",
  "emulators:start": "firebase emulators:start --import=./dir"
}
This will allow you to start the emulators by running npm run emulators:start and save the current data at any time with npm run emulators:save.
Summary
Using emulators for development has saved our team hundreds of hours in both development and testing time in the last couple of years, in addition to providing more consistency to our testing and reducing frustration.
You can get started with emulators in four steps:
- Setup and install the emulators
- Configure your application to use the emulators from localhost
- Create your baseline test data
- Load the test data each time you run emulators
The key terminal commands you'll need include:
firebase init emulatorsto add emulator support to a projectfirebase emulators:startto start up the emulatorsfirebase emulators:start --export-on-saveto start the emulators and save the data produced when shutting them downfirebase emulators:export ./dirto export the current emulator data to a folderfirebase emulators:start --import=./dirto start up the emulators using data stored in a folder
Be sure to review the references below if you want more information about how to maximize your use of emulators. Please feel free to contact me with any questions or to share your story about how emulators have helped you.


